
⚡️ Turn Jupyter Notebooks into Blog Posts
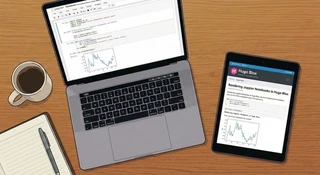 Image credit: HugoBlox
As a researcher or data scientist, your work often lives in Jupyter Notebooks. But sharing those insights effectively usually means taking screenshots, messy copy-pasting, or exporting to PDF.
Hugo Blox changes that. With the {{< notebook >}} shortcode, you can render your actual .ipynb files directly as beautiful, interactive blog posts or project pages. Keep your code, outputs, and narrative in one place.
Table of Contents
Why publish notebooks?
Reproducible Research: By publishing the actual notebook, you allow others to download and run your code, verifying your results and building upon your work.
- No more screenshots – Render crisp code and vector plots directly from your source.
- Theme consistent – Notebooks automatically adapt to your site’s theme (including dark mode).
- Flexible sourcing – Display notebooks from your
assets/folder, page bundles, or even directly from a remote GitHub URL. - Interactive – Users can copy code blocks or download the full notebook to run locally.
Example: Data Science Workflow
Below is a live example of a notebook rendered right here in this post. Notice how the markdown, code, and outputs (text, HTML, and JSON) are all preserved and styled.
Launch Readiness Analysis
Python · Kernel: Python 3 · nbformat 4.5 · 6 cells
Ship Notebook Stories in Minutes
Hugo Blox Notebook renderer turns your .ipynb experiments into beautiful long-form posts.
Use this sample to see how markdown, code, and outputs flow together.
- Drop notebooks inside
assets/notebooks/(or import them as page resources). - Reference them with
{{</* notebook src="your.ipynb" */>}}. - Control code, outputs, metadata badges, and download links via shortcode params.
| |
Collecting data...
Training notebook-ready block...
Done!
0.982 | |
Notebook blocks are theme-aware and dark-mode friendly.
| |
{
  "metrics": {
    "engagement_rate": 0.73,
    "read_time_minutes": 4.6,
    "subscribers": 1280
  }
}Tip: Pair this block with Call-to-Action cards or the Embed shortcode to link to GitHub repos, datasets, or ARXIV preprints.
How to add a notebook
- Save your notebook. Place your
.ipynbfile inassets/notebooks/(for global access) or inside a page bundle (likecontent/blog/my-post/analysis.ipynb). - Add the shortcode. In any Markdown page, simply use:
{{< notebook src="analysis.ipynb" >}} - Customize. You can hide code cells for non-technical audiences (
show_code=false) or just show the output (show_outputs=true).
Hugo Blox respects your privacy. Notebook rendering happens statically at build time—no third-party services required.
Next steps
- Try it out: Drop one of your existing notebooks into this site and see how it looks.
- Link your papers: Use the Embed shortcode to link your notebook to your latest arXiv preprint or GitHub repository.
- Get help: Join the community on Discord or check the documentation.
Happy researching! 🚀

Gratitude is the attitude. 珍惜已有的一切
这里是内容沉淀的地方,也是博客内容沉淀的地方。分享出行攻略、健康食谱、旅行感受、心态调整。
戒porn马拉松运动员,正在用每一天的坚持,重新定义自己。WINOTD运动的发起人,希望通过这个运动帮助更多人。
未来这里也会成为AI付费产品和课程的推广分享平台。欢迎关注,一起成长!😊